

Actual color may vary from on-screen representation.
VALSPAR’S ONE GALLON CHALLENGE
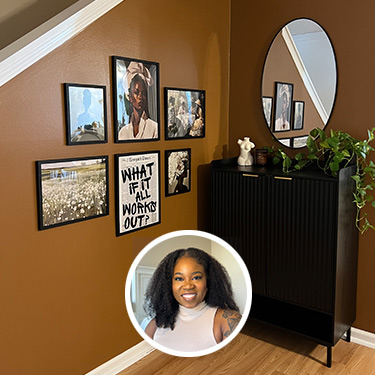
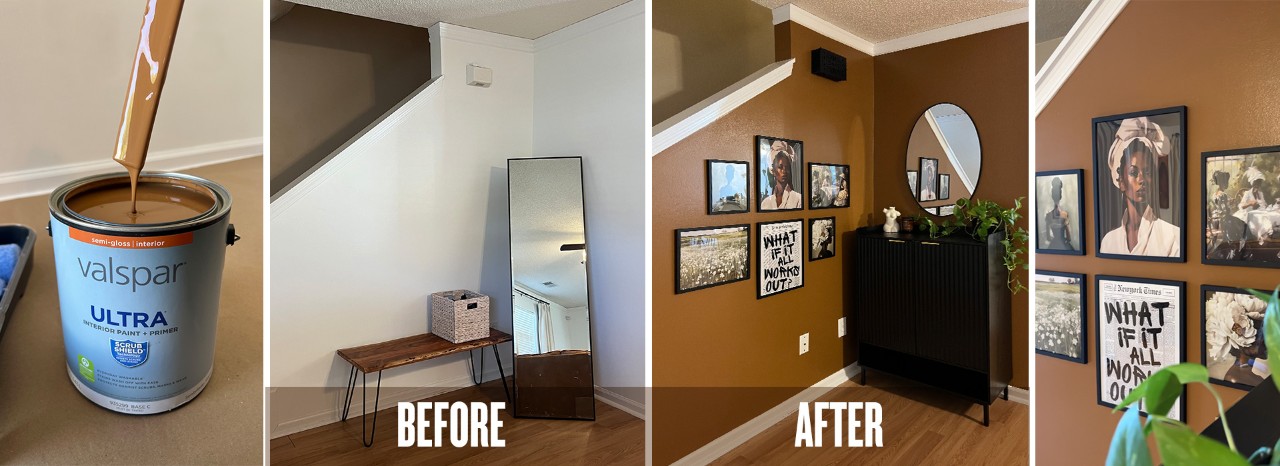
Entryway Transformation
SUPPLIES YOU WILL NEED
- Valspar Ultra Interior Paint + Primer in Semi-gloss – 1 gallon
- Valspar Wall and Trim 2-in Reusable Polyester Angle Trim/Wall brush
- Valspar 4-in x 3/8-in Nap Walls and Ceilings Polyester Mini Paint Roller
- Valspar Walls, Ceilings Trim 6 -Piece Knit Paint Roller Kit
- Drop Cloth
- 220-Grit Sandpaper (optional)
- Painters Tape
STEP-BY-STEP INSTRUCTIONS
First things first, I needed to clear this space! As you can see this space didn’t have a lot going on, so it only took a few minutes to remove the bench, mirror and vacuum the entryway.
Next, I used 220-grit sandpaper to smooth out any imperfections, uneven patches, or previous paint drips. I made sure to focus on any bumps and uneven texture. This allowed me to ensure I was starting with a smooth base. After sanding I wiped the walls down with a microfiber mop.
Once the sanding was complete, I wanted to make sure my walls were clean, so I wiped them down with a spin mop.
First, I laid down my drop cloth using painter’s tape. I prefer the paper drop cloth because it makes cleaning up super easy, I don't have to worry about paint leaking through the fabric drop cloth and it’s not slippery like a plastic drop cloth.
Once my drop cloth was in place, I removed the outlet covers. When I first started painting, I would leave the covers on and no matter how careful I was, I always got paint on them. So, learn from me and do it right the first time.
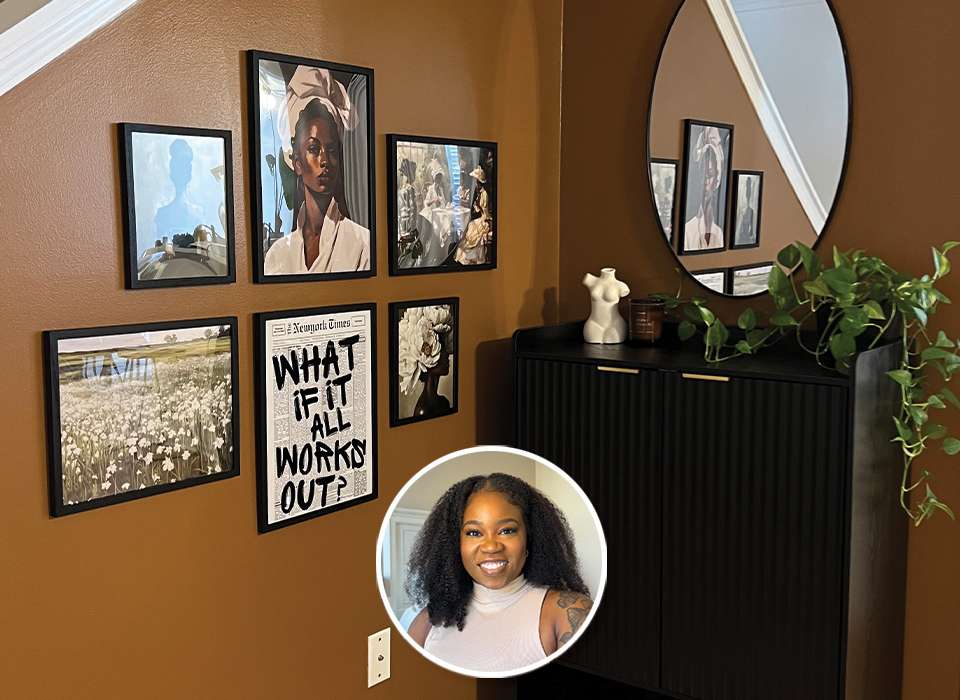
For this project I used Valspar Ultra Interior Paint + Primer in the Semi-gloss finish in the color Natural Cork 2008-7A.
When painting a space I like to use 3 different painting tools. I always start with a Valspar Wall and Trim 2-in Reusable Polyester Angle Trim/Wall brush. This allows me to get close to the edges of the wall and create straight lines without the hassle or time consummation of applying painters tape.
Next, I went in with my Valspar 4-in x 3/8-in Nap Walls and Ceilings Polyester Mini Paint Roller. This step helped me to blend the brush strokes out and get into the corners of the walls. This acts as a transition between the cut in areas and the larger areas.
Once my space was outlined. I applied my paint evenly to the wall in a “W’ motion. This helps to spread the paint out without leaving any streaks. When painting, I roll the entire length of the wall to ensure that I am keeping a wet edge. The last thing you want is for all your hard work to be ruined by paint lines. My 9-inch roller and paint tray were included in my Valspar Walls, Ceilings Trim 6 -Piece Knit Paint Roller Kit.
After the entire wall was covered, my next step was to backroll, which entails going over the wet paint with a dry roller. This ensures an even coverage.
After waiting for the paint to dry (which I hate doing so I ran some errands and picked up the gallery wall prints) I used 220-grit sandpaper to lightly sand in between coats to remove any roller texture.
After I sanded the first coat of paint, I repeated steps 5-7, cutting in with angle brush, blending the brush strokes out, painting corners and around outlets with a 4-inch roller, followed by filling in with the 9-inch roller.
While the second coat of paint dried, I put together the shoe cabinet for this space.
Once the second coat was dry, it was time to hang the gallery wall. I began by arranging the frames on the floor to visualize the placement. I am so glad the frames came with cards to indicate exactly where to install the nails to hang the photos. To ensure everything was level I used my laser level to align the tops of the bottom row of frames and the bottom of the top row of frames.
Now that my furniture was in place I added a vase, candle and my Pothos plant to complete the look.

MORE PROJECTS BY KANISHA JENKINS
NEXT PROJECT
Coming Soon